Reliable valve inspection ensures flawless valve discs for fuel injectors
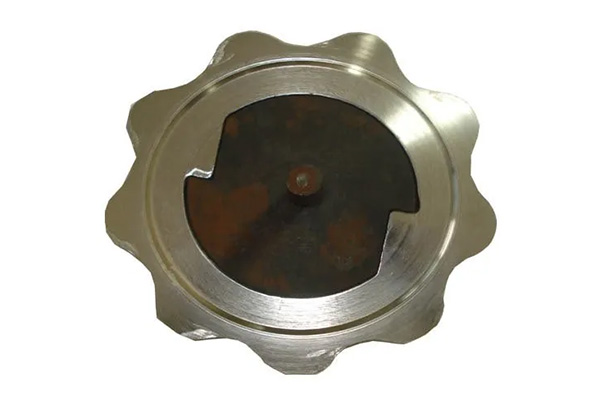
The metal valve disc is a critical component in a fuel injector’s design. To ensure a fuel-tight seal throughout the injector’s service life, its outer rim must be complete, uniform, and free from any dents, breaks, or damage.
Our client, a manufacturer of precision valve discs, faced a challenge in their automated production process as traditional valve inspection methods were time-consuming and could not keep up with their production speed of 40 parts per minute.
This manual checking also lacked traceability, preventing the generation of printed reports or visual results necessary for quality assurance.
Automated valve inspection revolutionises quality control
To address this, Optimax implemented a complete automated inspection solution of the valve discs designed to meet the key requirements:
- High-Speed Throughput: The inspection system needed to operate at the same rate as the production line, checking 40 parts per minute.
- Rotational Freedom: As components arrive in random orientation, the system needed to inspect the entire valve disc rim from any angle.
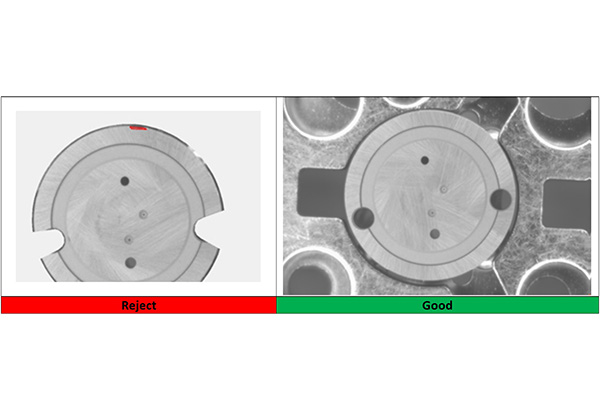
- Precision and Exclusions: The system had to accurately identify critical defects on the outer rim but ignore permitted imperfections, such as scratches on the surface.
The Inspekto S70, automated visual inspection system is perfectly suited for this application. By integrating this system, our client was able to achieve 100% inspection coverage. This valve inspection solution not only improved product quality but also provided a fully traceable methodology with digital reports and visual documentation, transforming the quality control process.
Contact us to find out more about the Inspekto 70 and how it could help in your business.


The Inspekto S70 autonomous machine vision system
We recommend the Inspekto S70 autonomous machine vision system, which uses a camera and a powerful AI (Artificial Intelligence) image processing system to spot defects whilst minimising false positives. The system is trained using good components and can be configured to ignore product parts that differ by design (such as serial number labels). It is tolerant of orientation and positioning and can scan components placed in the camera’s field of view and on a conveyor belt. Where defects are found, they are identified in red on the displayed or recorded image to facilitate rework.


