Meticulously inspect piston coatings for unwanted defects
Relying solely on human inspection of piston coatings can result in unidentified defects, whether due to distraction, fatigue, or just general missed sightings. The manual examination process poses challenges as it’s time-consuming and less effective, particularly in scenarios with high production rates.
What does piston coating do?
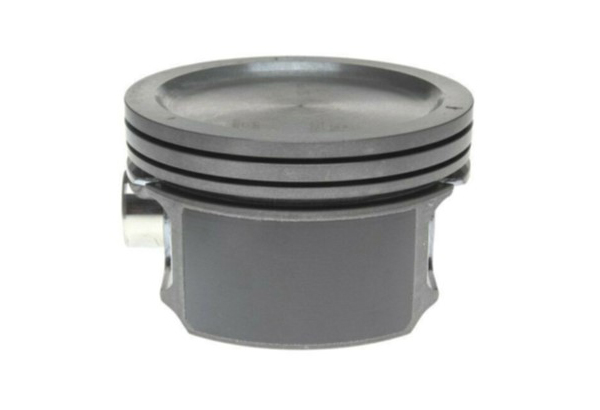
A critical area to ensure the maximum lifespan of a piston is the integrity of the coatings that are applied. Pistons and other essential automotive components undergo a coating process involving diverse materials that are baked to ensure hardness and other critical physical attributes. It is vital to ensure that the coating is even, without breaks, and fully covers the specific areas of the piston. Coated pistons can operate at elevated temperatures and any defect in the coating could lead to component failure.
Defects that are not identified, could have a major impact on the robustness and reliability of the piston. This requires a comprehensive automated inspection system that removes human subjectivity and covers 100% of the component.
AI defect detection is the only solution
Inspecting piston coatings is even more challenging as the piston is featureless and highly reflective, with variable orientations. Achieving uniform coating coverage on such surfaces becomes a critical aspect of maintaining the overall quality and performance of automotive components.
The coating application is integrated into a high-speed production line, where pistons move along a conveyor belt at 60 parts per minute. The rapid rate of this manufacturing process necessitates a robust and efficient AI inspection system to promptly identify and rectify any potential defects, ensuring the reliability and longevity of the coated pistons in the demanding automotive environment.
A solution to this problem is the Inspekto S70, an autonomous machine vision system that uses a combination of a camera and a robust AI image processing system to detect defects adeptly while minimising false positives.


Inspekto S70
We recommend The Inspekto S70, an autonomous machine vision system that uses a combination of a camera and a robust AI (Artificial Intelligence) image processing system to detect defects adeptly while minimizing false positives. Training the system is swift and accomplished in less than one hour, as it learns from examples of good components. Notably, the system can disregard design-related differences, such as serial number labels, ensuring a focused and accurate defect identification process.
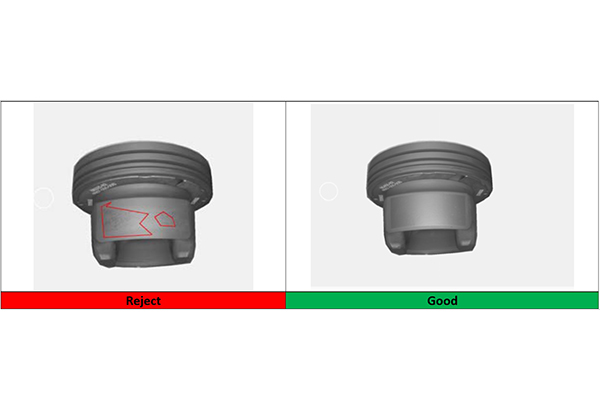
Operating at an impressive rate of 60 parts per minute, the Inspekto S70 highlights its efficiency in high-throughput environments. Its versatility extends to its tolerance of varying orientations and positions, enabling seamless inspection of components within the camera’s field of view and on a conveyor belt. When defects are identified, they are distinctly red on the displayed or recorded image, streamlining the rework process and facilitating quick corrective actions. The system’s comprehensive capabilities make it a reliable and adaptable solution for rigorous quality control in diverse manufacturing settings.


